Hey folks!!
Let me get started with a simple question, What if we have a large website and we need to store media and files in a safe place? That's where Amazon S3 comes in handy! To begin with what is an S3 bucket?
S3 Buckets in AWS
Amazon Simple Storage Service (Amazon S3) is a scalable object storage service provided by Amazon Web Services (AWS). S3 is designed to store and retrieve any amount of data from anywhere on the web. It's commonly used for backup, archiving, content distribution, and serving static websites.
In general, to access and store items in a bucket we need to give permission. To avoid this access permission every time someone uploads or downloads, we use presigned URLs.
What is a presigned URL?
A presigned URL, in the context of Amazon S3 (Simple Storage Service) and other cloud storage services, is a URL that grants temporary access to a specific resource (such as an object or file) in a bucket. This temporary access is usually limited by time and permissions.
So here rather than the theoretical aspect we will be focusing more on the coding aspect and how to store and retrieve objects using a presigned URL.
Let's go ahead and get things started!
For this tutorial you will need prior knowledge of:
- Serverless backends and functions
- React TypeScript
- React libraries like react-dropzone and react-hook-form
STEP 01 – Preparing the S3 bucket
Let's first get started with the backend. Initially we need to create a bucket in our serverless.yml file for the objects to be stored.
We need to initialize a bucket and provide its name and resources for it to be created.
# declaring the bucket in the custom section of the serverless file
bucketName: "content-uploads-bucket-${sls:stage}"

# giving permission to the bucket
Resource:
  - Fn::GetAtt: [ExampleTable, Arn]
  - "arn:aws:s3:::${self:custom.client}-${self:custom.bucketName}"
  - "arn:aws:s3:::${self:custom.client}-${self:custom.bucketName}/*"

# giving the properties to the bucket
BucketUpload:
  Type: AWS::S3::Bucket
  Properties:
    BucketName: ${self:custom.client}-${self:custom.bucketName}
    CorsConfiguration:
      CorsRules:
        - AllowedMethods:
            - "GET"
            - "PUT"
            - "POST"
            - "HEAD"
          AllowedOrigins:
            - "*"
          AllowedHeaders:
            - "*"
Once the serverless file is ready we need to deploy it to cloud using serverless deploy and make sure the bucket is up and available.
Step 02 – Adding backend methods and APIs
Now let's code the backend and generate a presigned URL.
First within the backend, we need to make a utility file and the following codes to upload and download files.
const {
  S3Client,
  PutObjectCommand,
  GetObjectCommand,
} = require("@aws-sdk/client-s3")
const { getSignedUrl } = require("@aws-sdk/s3-request-presigner")

const { v4: uuidv4 } = require("uuid")
const s3Client = new S3Client()

const BUCKET_NAME = process.env.BUCKET_NAME

const uploadFileToS3 = async (resourceName, fileName) => {
  const fileId = uuidv4()
  try {
    const objectKey = `${resourceName}/${fileId}/${fileName}`
    const presignedUrl = await getSignedUrl(
      s3Client,
      new PutObjectCommand({
        Bucket: BUCKET_NAME,
        Key: objectKey,
      }),
      { expiresIn: 3600 }
    )
    console.log("presignedUrl", presignedUrl)

    return {
      presignedUrl,
      filePath: objectKey,
    }
  } catch (error) {
    console.log("file upload error", error)
  }
}

const downloadFileFromS3 = async downloadFilePath => {
  try {
    const presignedUrl = await getSignedUrl(
      s3Client,
      new GetObjectCommand({
        Bucket: BUCKET_NAME,
        Key: downloadFilePath,
      }),
      { expiresIn: 3600 }
    )
    console.log("presignedUrl", presignedUrl)
    return {
      presignedUrl,
      filePath: downloadFilePath,
    }
  } catch (error) {
    console.log("file upload error", error)
  }
}

module.exports = {
  uploadFileToS3,
  downloadFileFromS3,
}
Alright! Now let's create 2 APIs separately for each function.
API to upload a file
app.post("/api/common/upload-file", authenticationMiddleware, async function (
  req,
  res
) {
  const { resourceName, fileName } = req.body

  try {
    const { presignedUrl, filePath } = await uploadFileToS3(
      resourceName,
      fileName
    )
    res.json({ presignedUrl, filePath })
  } catch (error) {
    res.status(500).send(error.message)
  }
})
API to download a file
app.get("/api/common/download-file", authenticationMiddleware, async function (
  req,
  res
) {
  const { filePath } = req.query // Get filePath from query parameters

  try {
    const { presignedUrl } = await downloadFileFromS3(filePath)
    res.json({ presignedUrl })
  } catch (error) {
    res.status(500).send(error.message)
  }
})
That's all for the backend folks! We'll be focusing on the front end from the next step onwards.
STEP 03 – Binding the APIs and using them in frontend
Now let's move on to the front end and see how we can use these utility functions to upload and download files.
In the front end too, we are now going to make a utility file and bind our backend APIs.
Go ahead and make a utility.tsx file and let's create a function binding the APIs separately.
Function binding the Upload API
export async function uploadFileToS3(file: File, resourceName: string) {
  const response = await axios.post("/common/upload-file", {
    resourceName,
    fileName: file.name,
  })

  if (response.data.presignedUrl && file) {
    try {
      await fetch(response.data.presignedUrl, {
        method: "PUT",
        body: file,
        headers: {
          "Content-Type": file.type,
        },
      })
      return response.data.filePath
    } catch (uploadError) {
      console.error("Error uploading file", uploadError)
      toast("File upload failed.", {
        type: "warning",
      })
      return ""
    }
  }
}
Here once the file is uploaded the file path is returned as a response and we are going to save that file path in our database.
We pass this file path in our download function to download the respective file.
Function binding the download API
export async function downloadFileFromS3(filePath: string) {
  const response = await axios.get(`/common/download-file?filePath=${filePath}`)

  if (response.data.presignedUrl) {
    try {
      const downloadResponse = await fetch(response.data.presignedUrl)
      if (!downloadResponse.ok)
        throw new Error(`HTTP error! status: ${response.status}`)

      const blob = await downloadResponse.blob()
      const url = URL.createObjectURL(blob)
      return [url, blob]
    } catch (error) {
      console.error("Error downloading image: ", error)
      return ["", null]
    }
  }
}
Step 04 – Application of the function
Now let's see how to use these functions in our components here we will be uploading an image using an upload button first and then we will be downloading and displaying it.
Uploading a File
Here, we will be using the following UI where we can drag and drop or upload media files according to their type.

Knock knock! Back to the code!
Here I have used the React Drop zone library to implement the drag and drop container and I will be using this file upload component within my form.
First we handle the state of the input using the react hook useState.
const [mediaFiles, setMediaFiles] = useState<File[]>()
const [selectedFormat, setSelectedFormat] = useState<string>("single-image")
For the Uploads form, I'll be using the library "react-hook-form". This library has a submit handler function where we define the action on form submission. This is where we will be using our uploadFile function here, passing the media file and retrieve the uploaded file's path and then on submit we will be saving it in the database.
Let's look at the code for this.
<div className=" text-lg font-normal text-textColor">Post Type</div>
<div className="mt-2 flex flex-col text-sm font-normal">
  <Controller
    name="mediaType"
    control={control}
    render={({ field }) => (
      <>
        <Radio
          color="blue"
          id="picture"
          name="format"
          label="Single Image"
          checked={field.value === "single-image"}
          onChange={() => handleFormatChange("single-image")}
        />
        <Radio
          color="blue"
          id="carousel"
          name="format"
          label="Image Carousel"
          checked={field.value === "image-carousel"}
          onChange={() => handleFormatChange("image-carousel")}
        />
        <Radio
          color="blue"
          id="video"
          name="format"
          label="Video"
          checked={field.value === "video"}
          onChange={() => handleFormatChange("video")}
        />
      </>
    )}
  />
</div>
<div className=" text-lg font-normal text-textColor">
  Post Content
  <div className=" mt-4">
    <FileUpload
      uploadType={selectedFormat}
      setMediaFiles={setMediaFiles}
    />
  </div>
</div>
Here we use a Controller which comes from react-hook-form to register the values we are saving to send them to the request payload.
Alright! We are almost there, now let's see how we pass the uploads function in the submit handler.
const onSubmit: SubmitHandler<ContentCard> = async formData => {
  console.log(mediaFiles)
  console.log(formData.mediaType)
  try {
    let mediaPaths: string[] = []

    if (mediaFiles && mediaFiles?.length > 0) {
      setLoading(true)

      for (const mediaFile of mediaFiles) {
        // Specify your desired folder name here
        const mediaFilePath = await uploadFileToS3(
          mediaFile,
          `content-posts/${formData.mediaType}`
        )
        mediaPaths.push(mediaFilePath)
        console.log("mediaFilePath: ", mediaFilePath)
      }

      setLoading(false)
    }

    const updatedFormData: ContentCard = {
      ...formData,
      mediaData: mediaPaths,
    }

    await addContentCard(updatedFormData)

    reset()
    onClose()
  } catch (error) {
    console.error("Error uploading files:", error)
  }
}- Here we will be adding media data to a content post card, therefore, on the submit handler I have defined the object type to be 'Content Post'.
- Then using the states, we defined earlier, we check whether the Controller has captured any media file.
- We define an empty string array to store the retrieved media paths.
Question: Why are we using an array here?
The answer is simple! Since my upload media types include a carousel, multiple images will have to be uploaded and the paths of all the images have to be stored. Therefore, I am using an array here.
If you are uploading a single image, then you can define a simple string variable and assign the retrieved value there.
- Then we pass the media files to the uploadtoS3 function and store the return result in a variable called 'MediaFilePaths'
- Here I have specified the path to be
content-posts/${formdata.mediaType} - Therefore, all the files I will be uploading will be stored in a folder called 'content-posts' and within that folder we will have sub folders according to the media type and the files will be stored there.
- Then we are passing the retrieved file paths to the empty string array we declared using the JavaScript push method.
- Finally, we pass the updated form data to the add function and save the data in the database.
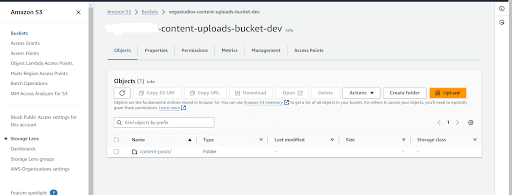
Now let's look at the bucket we created in AWS and see how the files are uploaded and saved.

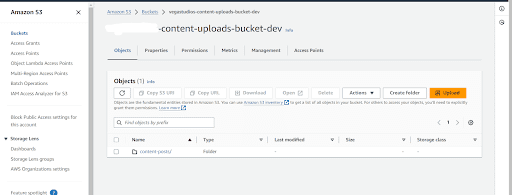
Here once the files are uploaded, the main folder has been created as we declare in the code.

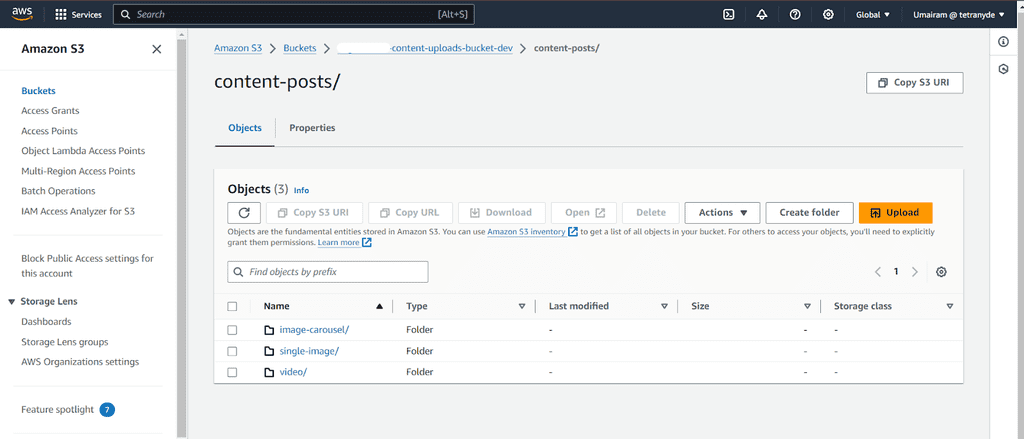
When we go into the folder, we can see the folders with the media types we passed.

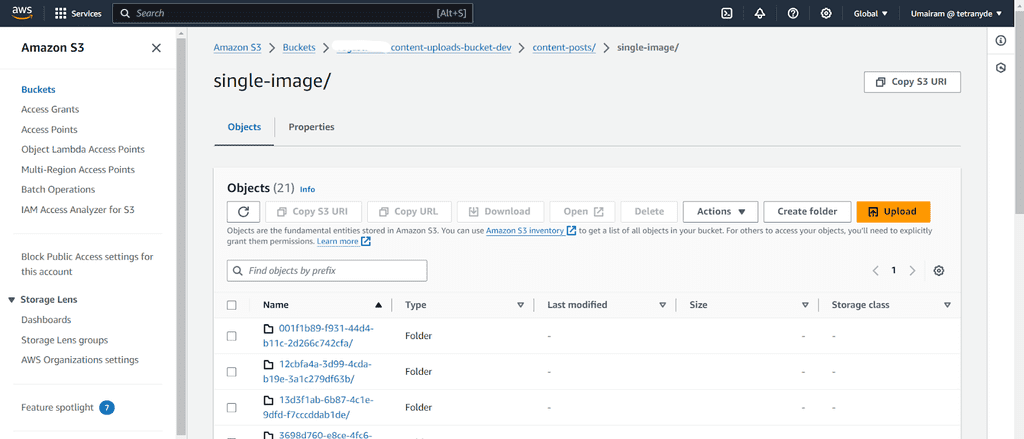
Wohoo! We can now find the uploaded files inside the bucket we have created!
Now let's see how we can retrieve these files using the download function.
Downloading a File
Downloading the file is a simple procedure, we've got our download function ready let's retrieve the data file path from our database and pass it to our function!
Here we are going to create a component called Dynamic Media to download and display the file according to the media type.
import React, { useEffect, useState } from "react"
import { downloadFileFromS3 } from "@/utils/commonUtil"
import Slider from "react-slick"
import "slick-carousel/slick/slick.css"
import "slick-carousel/slick/slick-theme.css"

interface DynamicMediaProps {
  type: "single-image" | "video" | "image-carousel" | string
  data?: string | string[]
}

const DynamicMedia: React.FC<DynamicMediaProps> = ({ type, data }) => {
  const [downloadedFiles, setDownloadedFiles] = useState<string[]>([])

  useEffect(() => {
    const fetchData = async () => {
      if (data && type === "single-image") {
        try {
          const [url] = await downloadFileFromS3(data as string)
          setDownloadedFiles([url])
        } catch (error) {
          console.error("Error downloading image: ", error)
        }
      } else if (data && type === "image-carousel" && Array.isArray(data)) {
        try {
          const downloadPromises = data.map(async imageUrl => {
            const [url] = await downloadFileFromS3(imageUrl)
            return url
          })

          const urls = await Promise.all(downloadPromises)
          setDownloadedFiles(urls)
        } catch (error) {
          console.error("Error downloading images: ", error)
        }
      } else if (data && type === "video") {
        try {
          const [url] = await downloadFileFromS3(data as string)
          setDownloadedFiles([url])
        } catch (error) {
          console.error("Error downloading video: ", error)
        }
      }
    }
    console.log(data)
    console.log(type)
    fetchData()
  }, [data, type])

  const settings = {
    infinite: true,
    speed: 500,
    slidesToShow: 1,
    slidesToScroll: 1,
    dots: true,
  }

  return (
    <div>
      {type === "single-image" && downloadedFiles.length > 0 && (
        <img
          src={downloadedFiles[0]}
          alt="Picture"
          className="h-96 w-96 rounded-md shadow-md"
        />
      )}

      {type === "video" && downloadedFiles.length > 0 && (
        <video controls className="rounded-md shadow-md">
          <source src={downloadedFiles[0]} type="video/mp4" />
          Your browser does not support the video tag.
        </video>
      )}

      {type === "image-carousel" && downloadedFiles.length > 0 && (
        <Slider {...settings}>
          {downloadedFiles.map((url, index) => (
            <img
              key={index}
              src={url}
              alt={`Carousel Image ${index + 1}`}
              className="h-96 w-96 rounded-md object-cover shadow-md"
            />
          ))}
        </Slider>
      )}
    </div>
  )
}

export default DynamicMedia
Here we use the "useEffect" hook and pass the download function and render the data whenever there is a media type and file path retrieved from the database with the main content.
Let's have a close look at the useEffect and see how the function is utilized.
useEffect(() => {
  const fetchData = async () => {
    if (data && type === "single-image") {
      try {
        const [url] = await downloadFileFromS3(data as string)
        setDownloadedFiles([url])
      } catch (error) {
        console.error("Error downloading image: ", error)
      }
    } else if (data && type === "image-carousel" && Array.isArray(data)) {
      try {
        const downloadPromises = data.map(async imageUrl => {
          const [url] = await downloadFileFromS3(imageUrl)
          return url
        })

        const urls = await Promise.all(downloadPromises)
        setDownloadedFiles(urls)
      } catch (error) {
        console.error("Error downloading images: ", error)
      }
    } else if (data && type === "video") {
      try {
        const [url] = await downloadFileFromS3(data as string)
        setDownloadedFiles([url])
      } catch (error) {
        console.error("Error downloading video: ", error)
      }
    }
  }
  console.log(data)
  console.log(type)
  fetchData()
}, [data, type])
Here within the useEffect as we discussed earlier for each media type, we check whether the media data and type is received and we pass the data which has the media file path to our download function to retrieve it!
Voila! That's all folks!
The files will be downloaded and displayed where you have defined your components!
